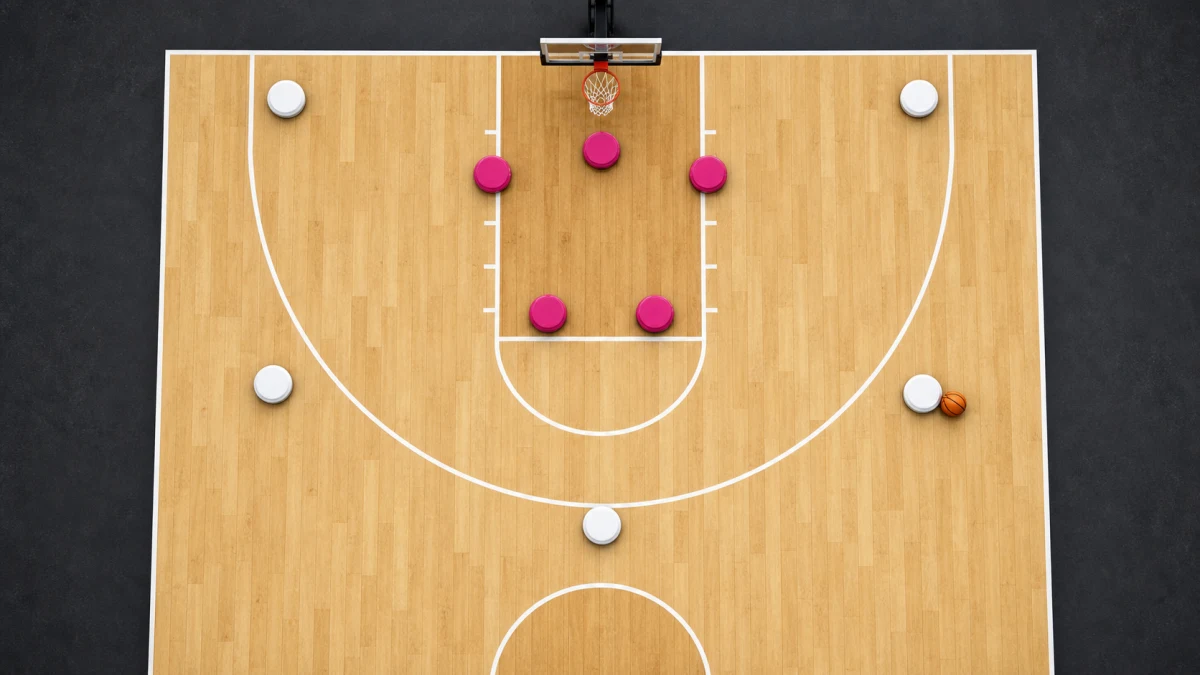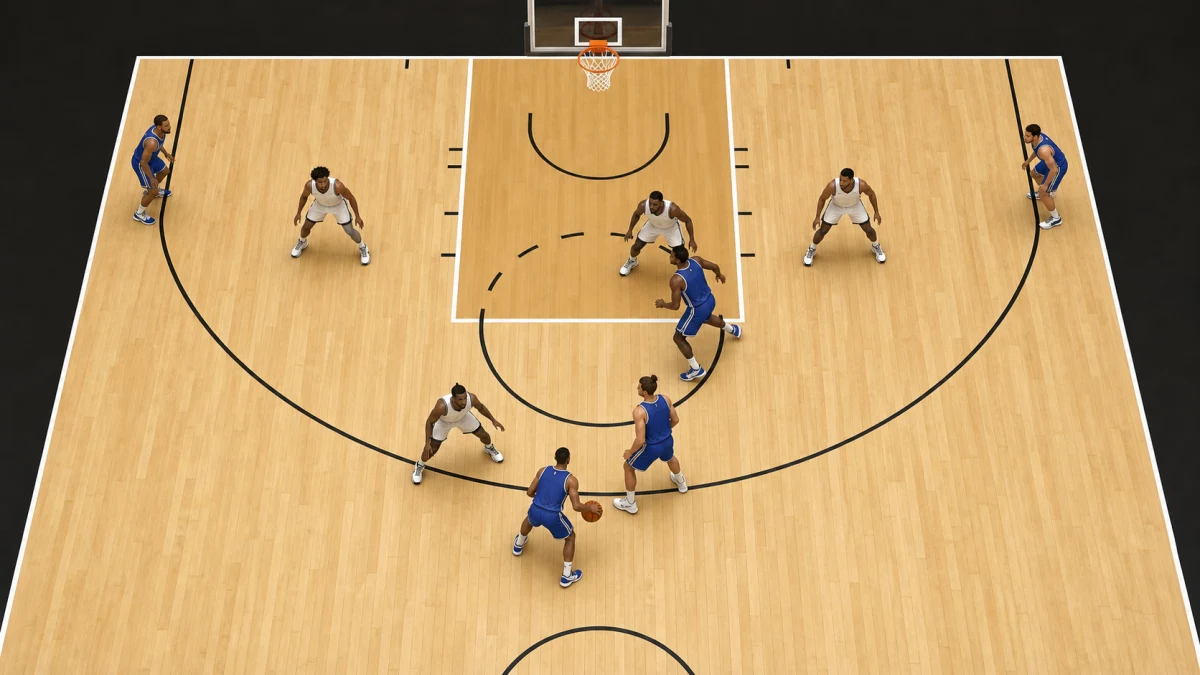

The short version: At each catch, locate both defenders, assess your shot and check the route to your next receiver. In the original example below, O2 can consider passing across to O3 because neither defender occupies that route. A different defensive response can change the answer.
Key takeaways
- After passing, keep watching the ball and present a target.
- An available receiver also needs a passing route that the defenders cannot close.
- Take a suitable shot when it is available; the illustrated extra pass is one possible choice.
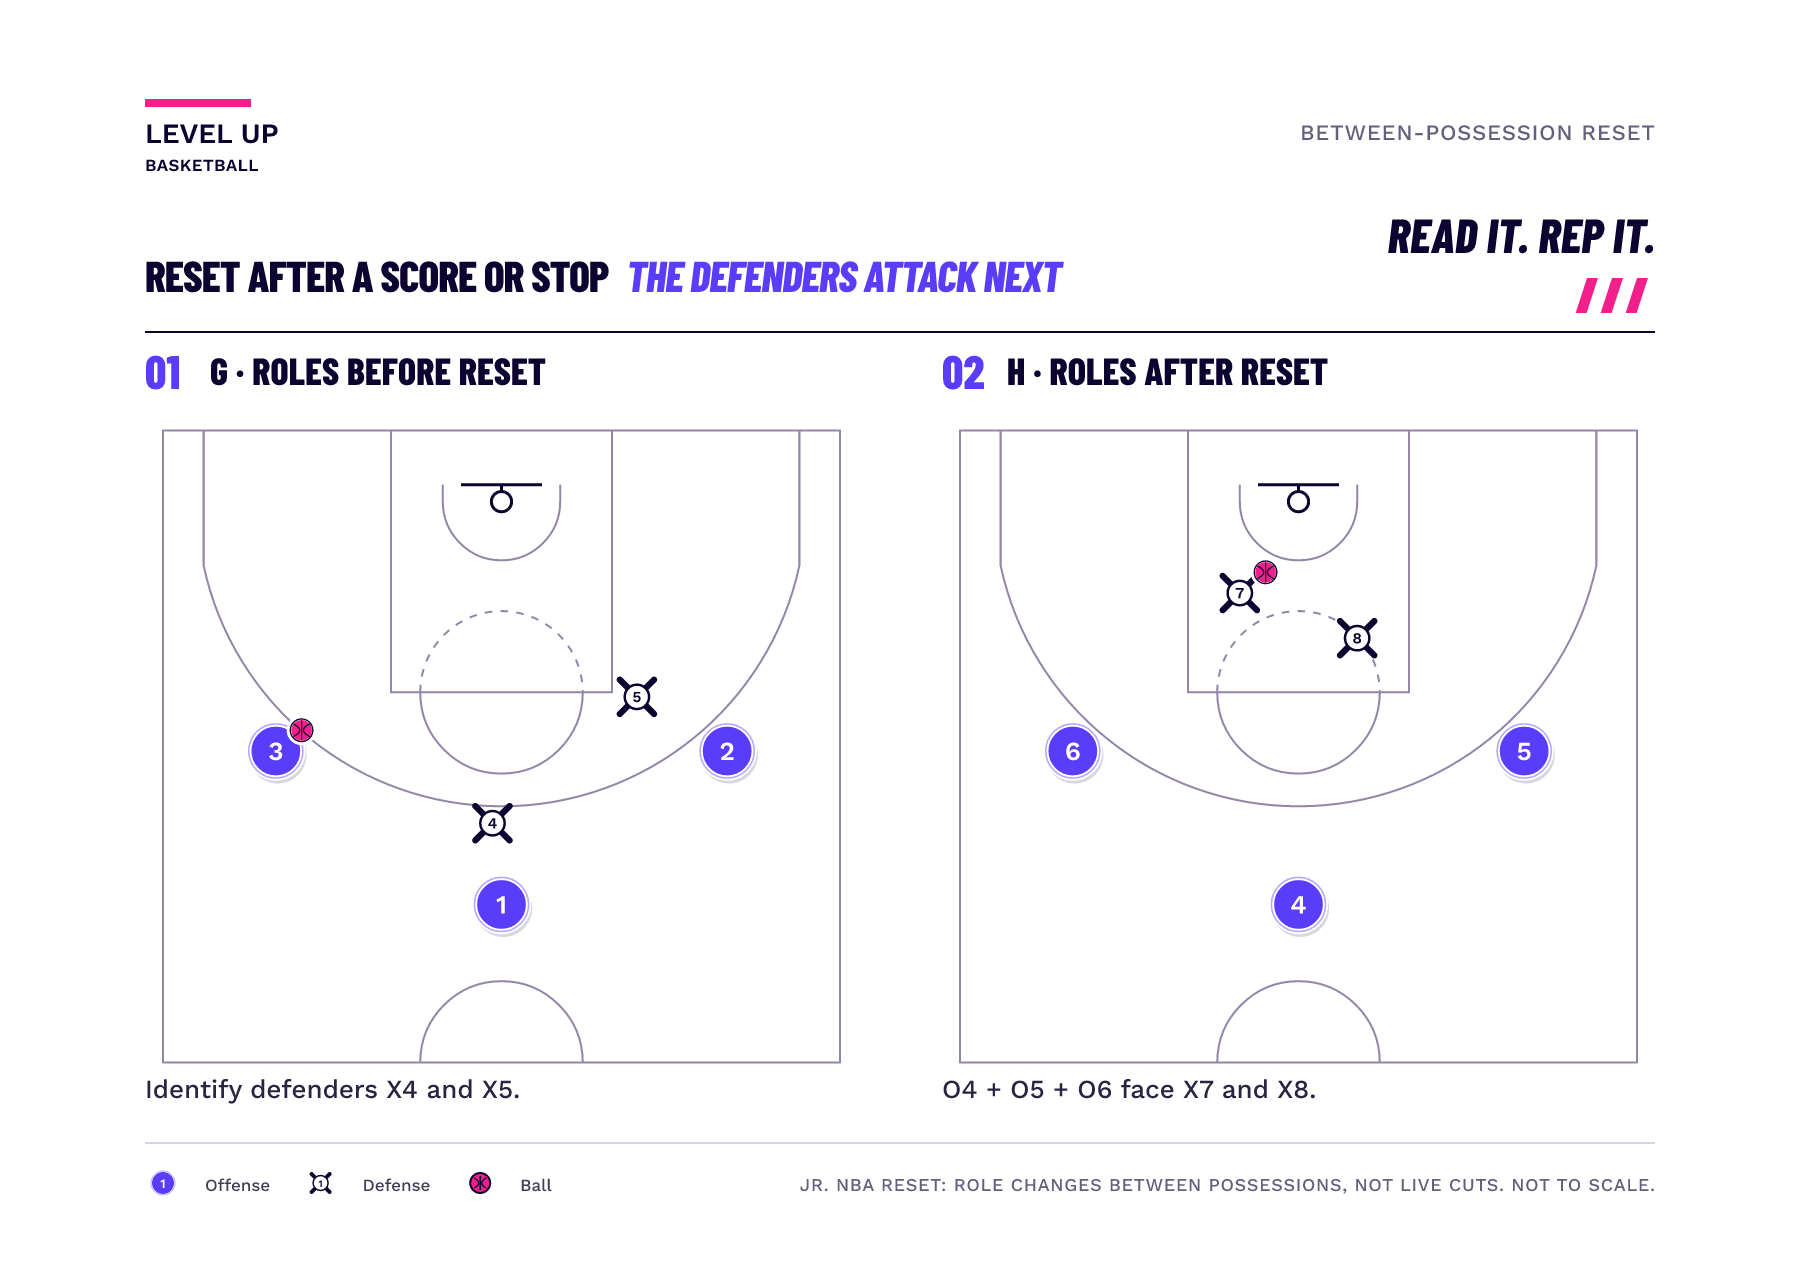
- In Jr. NBA’s reset after a score or defensive stop, both defenders become attackers with one added player, and two new defenders enter.
Start with the defender’s pass
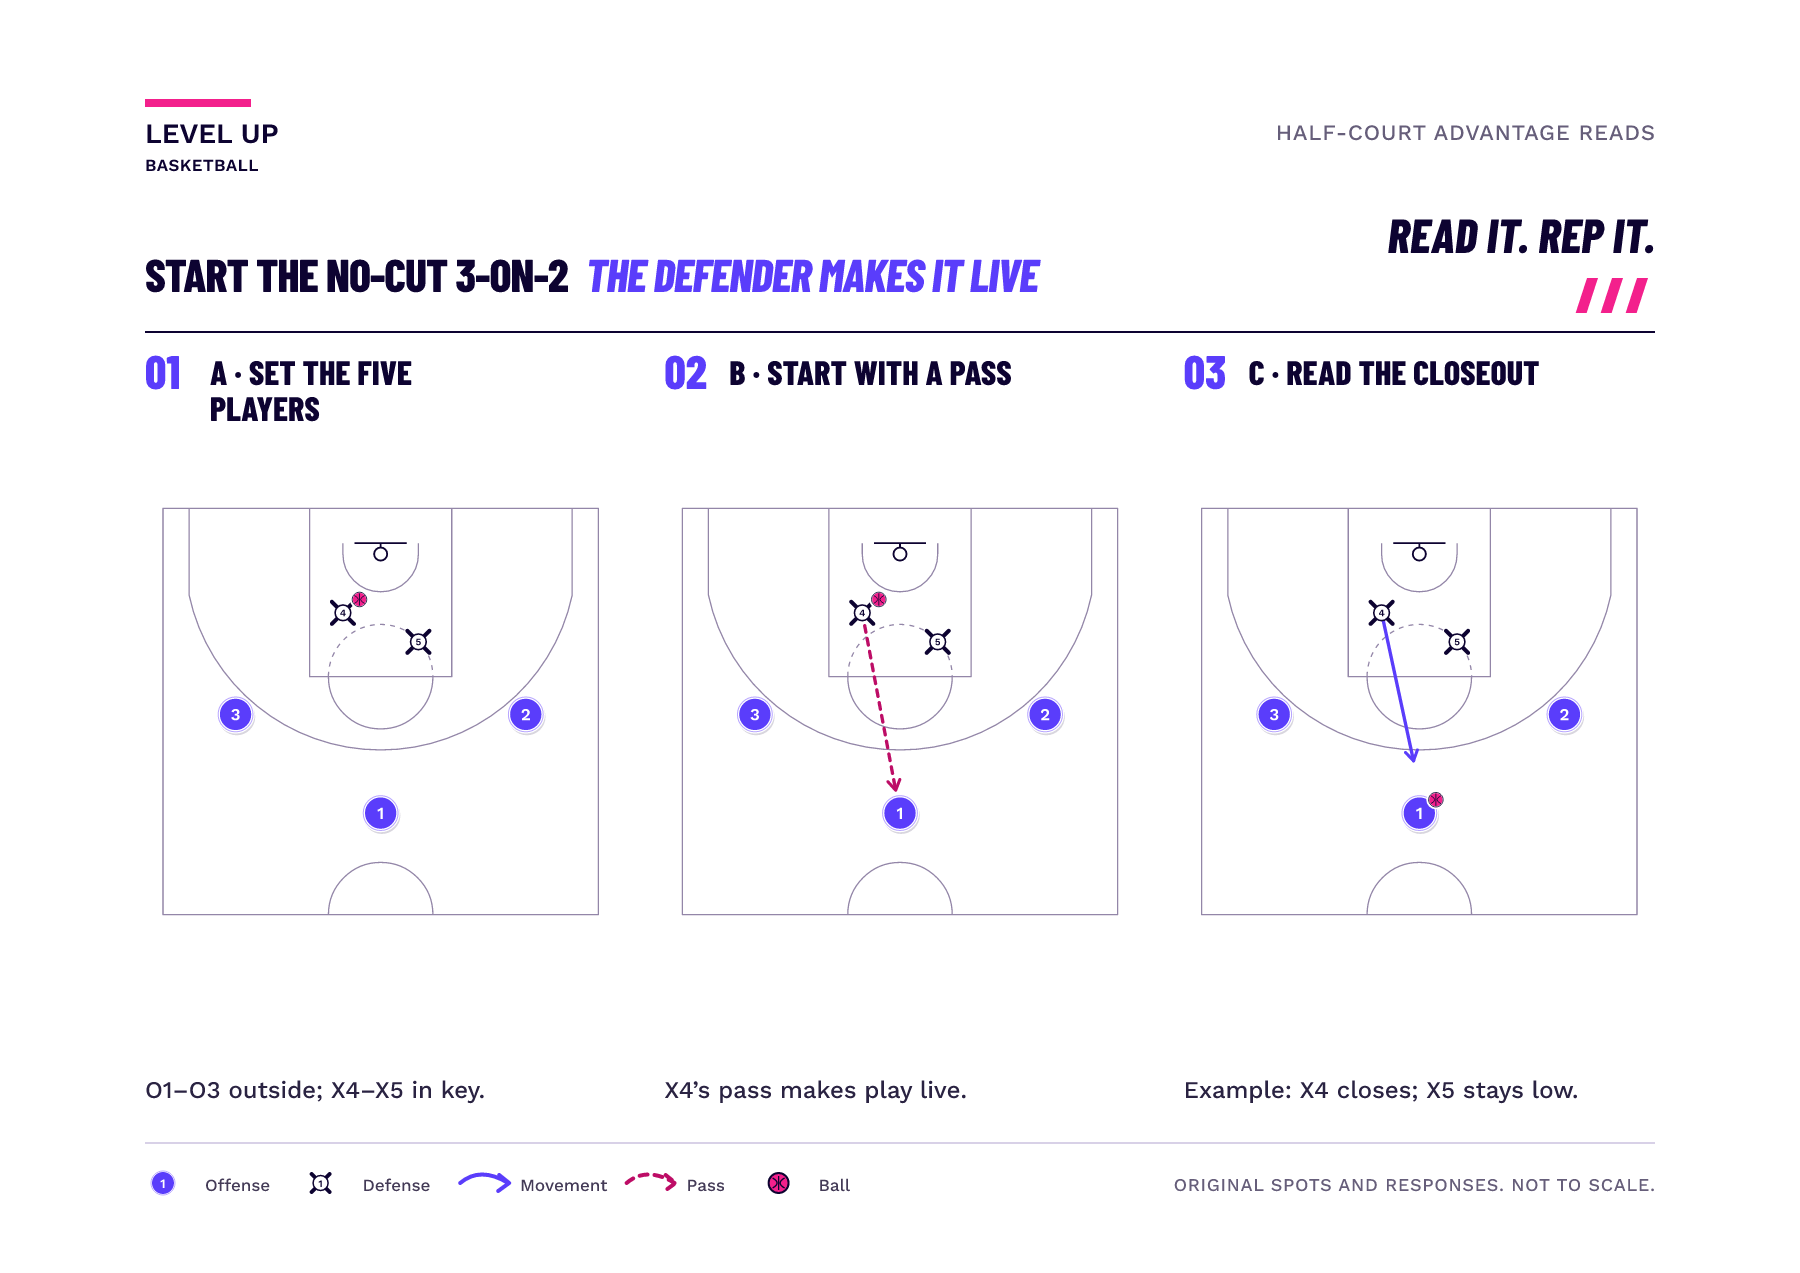
The first pass does not settle the possession. When the ball reaches the next attacker, the useful question is: where are both defenders now? The sequence below is an original schematic example for practicing that question. Its exact spots, passes and defensive responses are illustrative choices.
In Jr. NBA’s Starter Practice Plan 1, three attackers start anywhere outside the perimeter. Two defenders begin in the key, with one holding the ball. That defender passes to any attacker to make the possession live; the offense then tries to score. Our drawings choose a top spot for O1 and opposite wings for O2 and O3. X4 and X5 are the defenders, and player numbers stay with those players through the rotation. Starter Practice Plans - NBA.com: Jr. NBA
Jr. NBA’s base version does not allow offensive cuts. The attackers pass the ball around to seek a good shot. Keep that constraint in place while learning this read; the optional cutter comes later.
Swipe sideways to explore the full diagram.
Stay available without cutting
For this example, keep the three outside spots. Stay comfortably balanced, turn toward the ball and show your hands as a target. When you pass, keep watching: you may become the return option. Staying available does not require a cut. It requires attention to the ball and a receiving position from which you can secure the catch and assess the next play.
At the catch, find both defenders
Here, a window means an available opportunity to pass to a teammate. Read the whole route between you and the receiver. First locate the defender approaching the ball, then find the second defender. A teammate can look open while the second defender is positioned to intercept the pass. Ask whether either defender can reach the route as the ball travels.
In our original example, X4 has closed high toward O1. O1 passes to O2 on the right wing, and X5 begins to close toward O2. Freeze at O2’s catch. X4 is still high near O1; X5 is approaching from below the illustrated cross-court route. That leaves a candidate window to O3 on the opposite wing. O2 must still judge the defenders’ reach and whether that pass is manageable. Moving on the pass in zone defense
Swipe sideways to explore the full diagram.
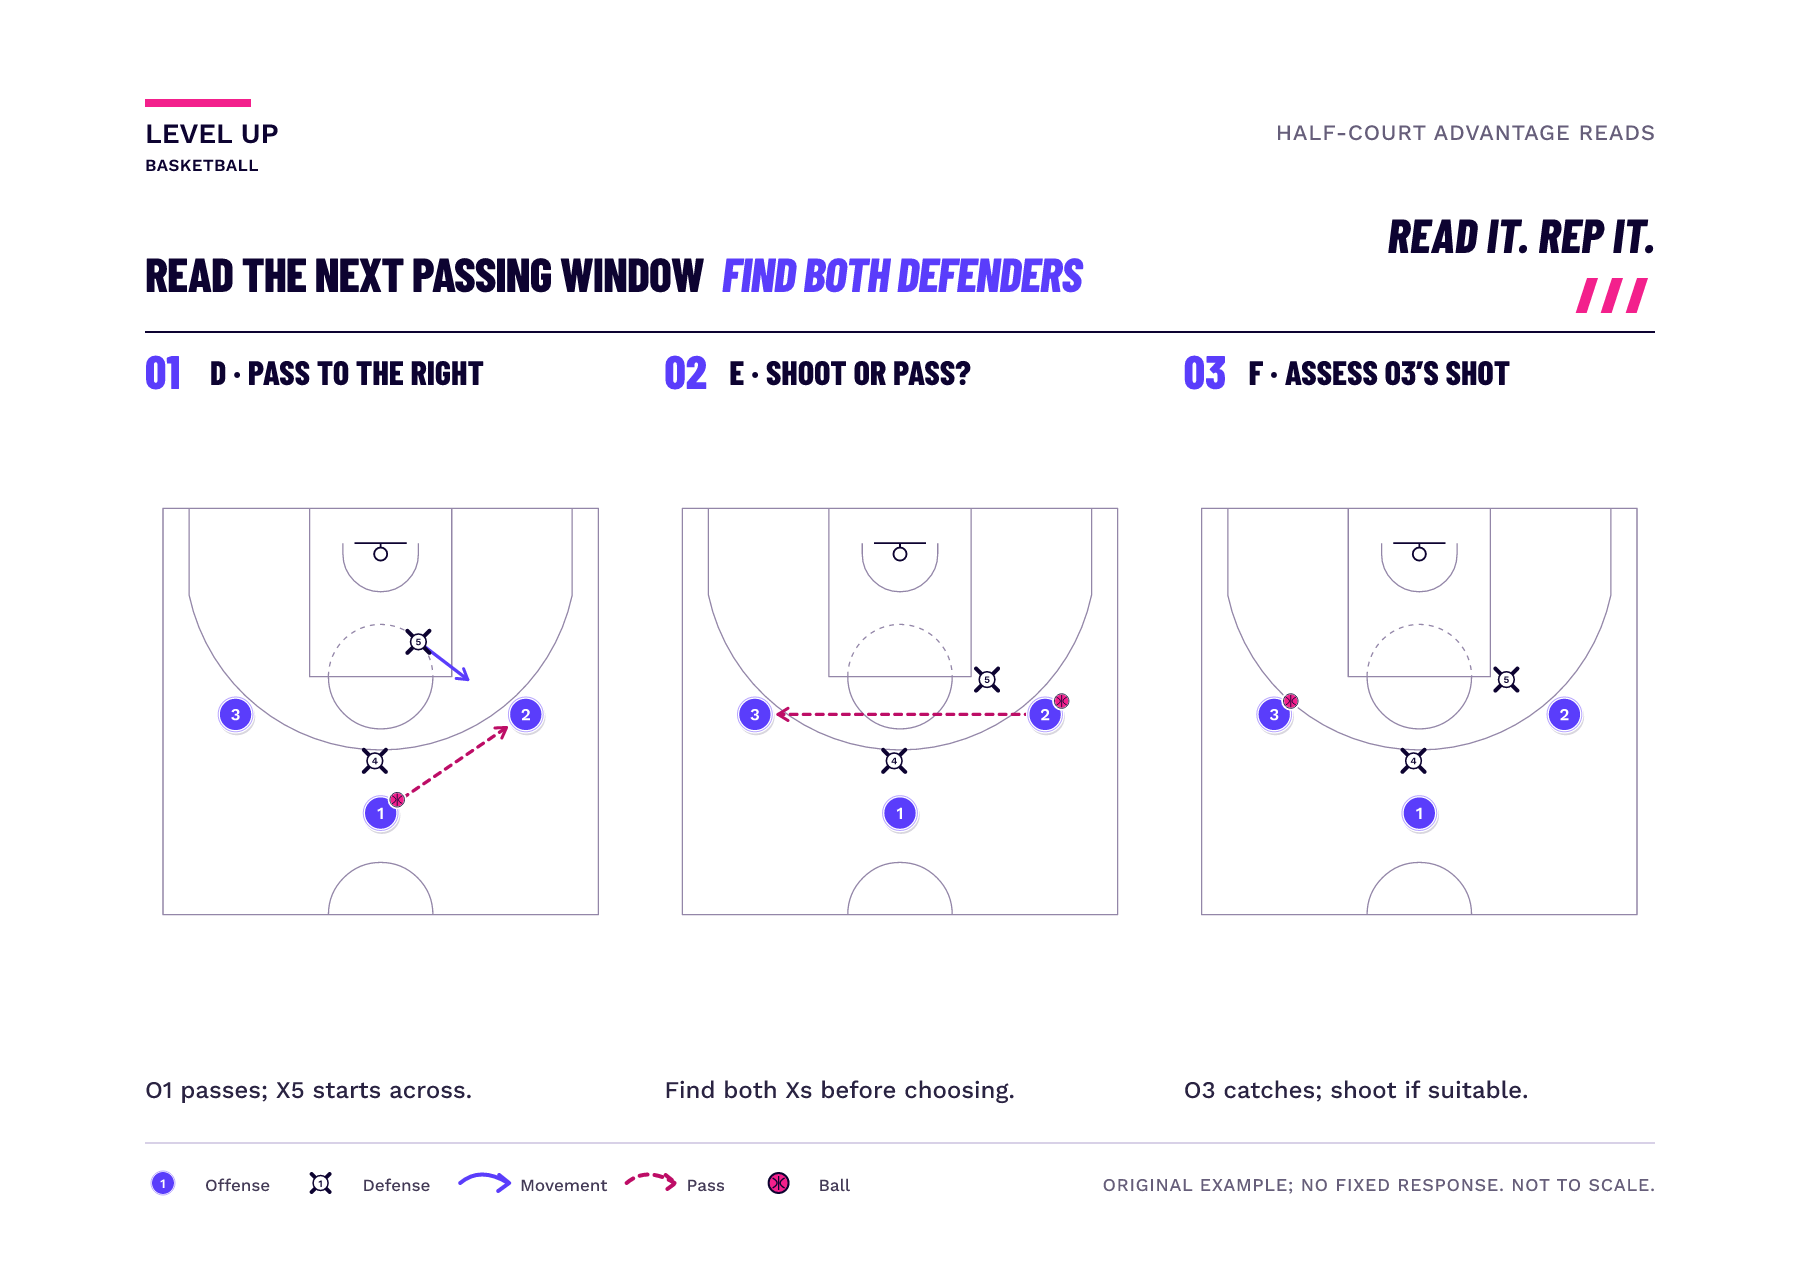
At O2’s catch in panel E, should O2 automatically send the ball across to O3?
No. Locate X4 and X5, assess the shot and check the full passing route. The drawing offers a route to O3, but the live defenders may be able to close it. Pass only if the opportunity is there and the distance suits the passer.
Another pass is useful when it reaches a teammate with a better opportunity through a route you can use. But assess the shot already in front of you. If O2 has a suitable open shot within their range, that can be the choice. If X4 drops into the cross-court route or X5 reaches it, reassess the shot and the other receiver instead of forcing the illustrated pass. O3 makes the same assessment after receiving.
Freeze the catch, explain the read, then resume
As a coaching option, briefly pause a possession at the new ball-handler’s catch. Ask the player to point out both defenders, identify a suitable shot and explain which passing route is available. Then resume from those positions. Let the defense respond differently on later possessions so players must read again. Choose outside starting spots that keep the passes manageable for your group; do not require the wide pass in the drawing just to reproduce the sequence.
Rotate the defenders onto offense
According to Jr. NBA, after a score or a defensive stop, both defenders rotate onto offense with one additional player, and two new defenders enter. In the example below, X4 and X5 become O4 and O5, player 6 joins them, and players 7 and 8 defend. Set a clear waiting order before starting; those selected player identities are simply our coaching example.
Swipe sideways to explore the full diagram.
Add one cutter as a separate progression
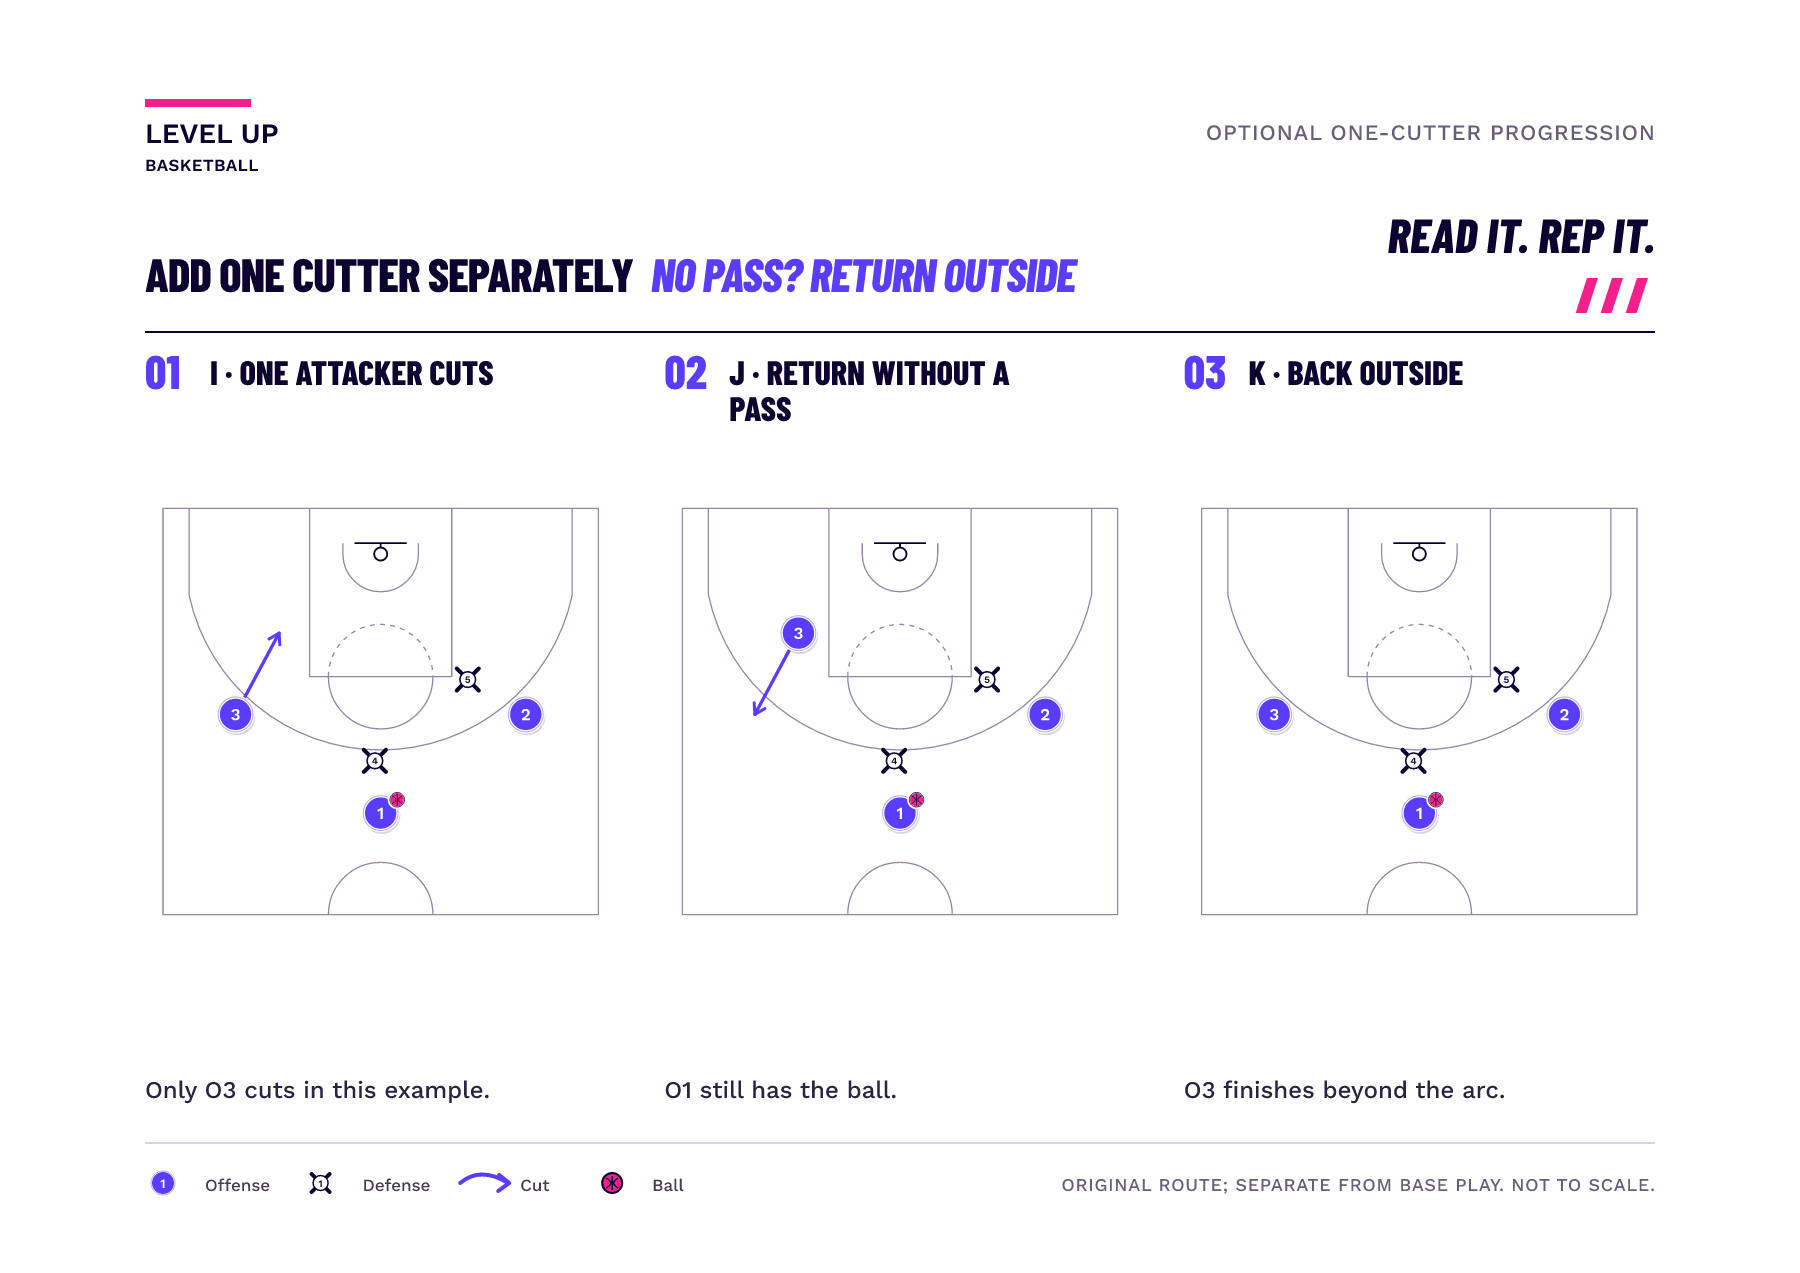
Jr. NBA offers an optional tactical load that allows one attacker to cut. If that player does not receive the ball, they must cut back outside the three-point line. Keep this progression separate from the base version. The drawing below follows only O3’s cut and return while O1 retains the ball.
Swipe sideways to explore the full diagram.
Was this useful?