
The short version: Transition defense is a dynamic team race to prevent easy layups. By establishing safety guards, protecting the rim first, and stopping the ball, teams can neutralize fast breaks.
Key takeaways
- Transition defense requires consistent effort and quick reactions from the entire team.
- Maintaining defensive balance is an important consideration after taking a shot.
- Sprinting back immediately is a fundamental aspect of transition defense.
- Defenders should stay alert and adjust their positioning as they run back.
The Primary Objective of Transition Defense
When transition defense is analyzed, the focus must remain on its most fundamental objective. The primary goal of transition defense is to prevent the opponent from scoring easy lay-ups on the break. Every defensive strategy and player movement must align with this primary goal. Preventing easy lay-ups on the break is the absolute priority when possession changes. By keeping this primary goal at the forefront, teams can structure their retreat to ensure that the opponent is denied these high-percentage scoring opportunities near the basket. Basketball Transition Defense, Coach's Clipboard Basketball Coaching
When sprinting back on defense, players must focus on their immediate reaction. The first two steps are critical when sprinting back on defense. A defender's performance during these first two steps determines how effectively they can retreat. Because the first two steps are critical when sprinting back on defense, players must prioritize their initial movement the moment possession changes. Focusing on these first two steps is essential for any player attempting to recover and establish a sound defensive position.
Establishing Floor Balance and Safety Guards
Establishing proper floor balance is essential when a team transition occurs. When a team shoots, at least one guard should stay back beyond the three-point arc as a safety instead of rebounding. This safety responsibility must be assigned to a specific player on the floor. Instead of participating in offensive rebounding, this designated guard must remain back beyond the three-point arc. Having at least one guard stay back as a safety instead of rebounding ensures the team has immediate protection against the opponent's transition.
The safety role requires clear communication and adaptability among teammates. If the designated safety guard drives to the hoop, a second guard must assume the safety responsibility. This rule ensures that the safety position is never left vacant when a shot is taken. If the primary safety guard drives to the hoop, the second guard must immediately recognize the movement and assume the safety responsibility. This cooperative adjustment maintains the team's defensive balance and prevents transition opportunities.
Adjusting Schemes to Opponent Style
Implementing a transition defense scheme does not have to be overly complex. Transition defense can be as simple as having one guard protecting back after a score, rebound, or steal, with the rest of the team hustling back on defense. When possession changes due to a score, rebound, or steal, having one guard protecting back provides immediate security. Meanwhile, the rest of the team must focus entirely on hustling back on defense to support the safety.
The defensive strategy must adapt to the specific characteristics of the opposing team. If the opponent is a fast-breaking team, transition defense may require two guards back. While a single guard back may be sufficient in other scenarios, a fast-breaking team presents a greater threat that may require two guards back to maintain defensive balance. Adjusting the system to have two guards back helps contain the opponent's speed and protects the basket more effectively during transition.
Roles of the First and Second Players Back
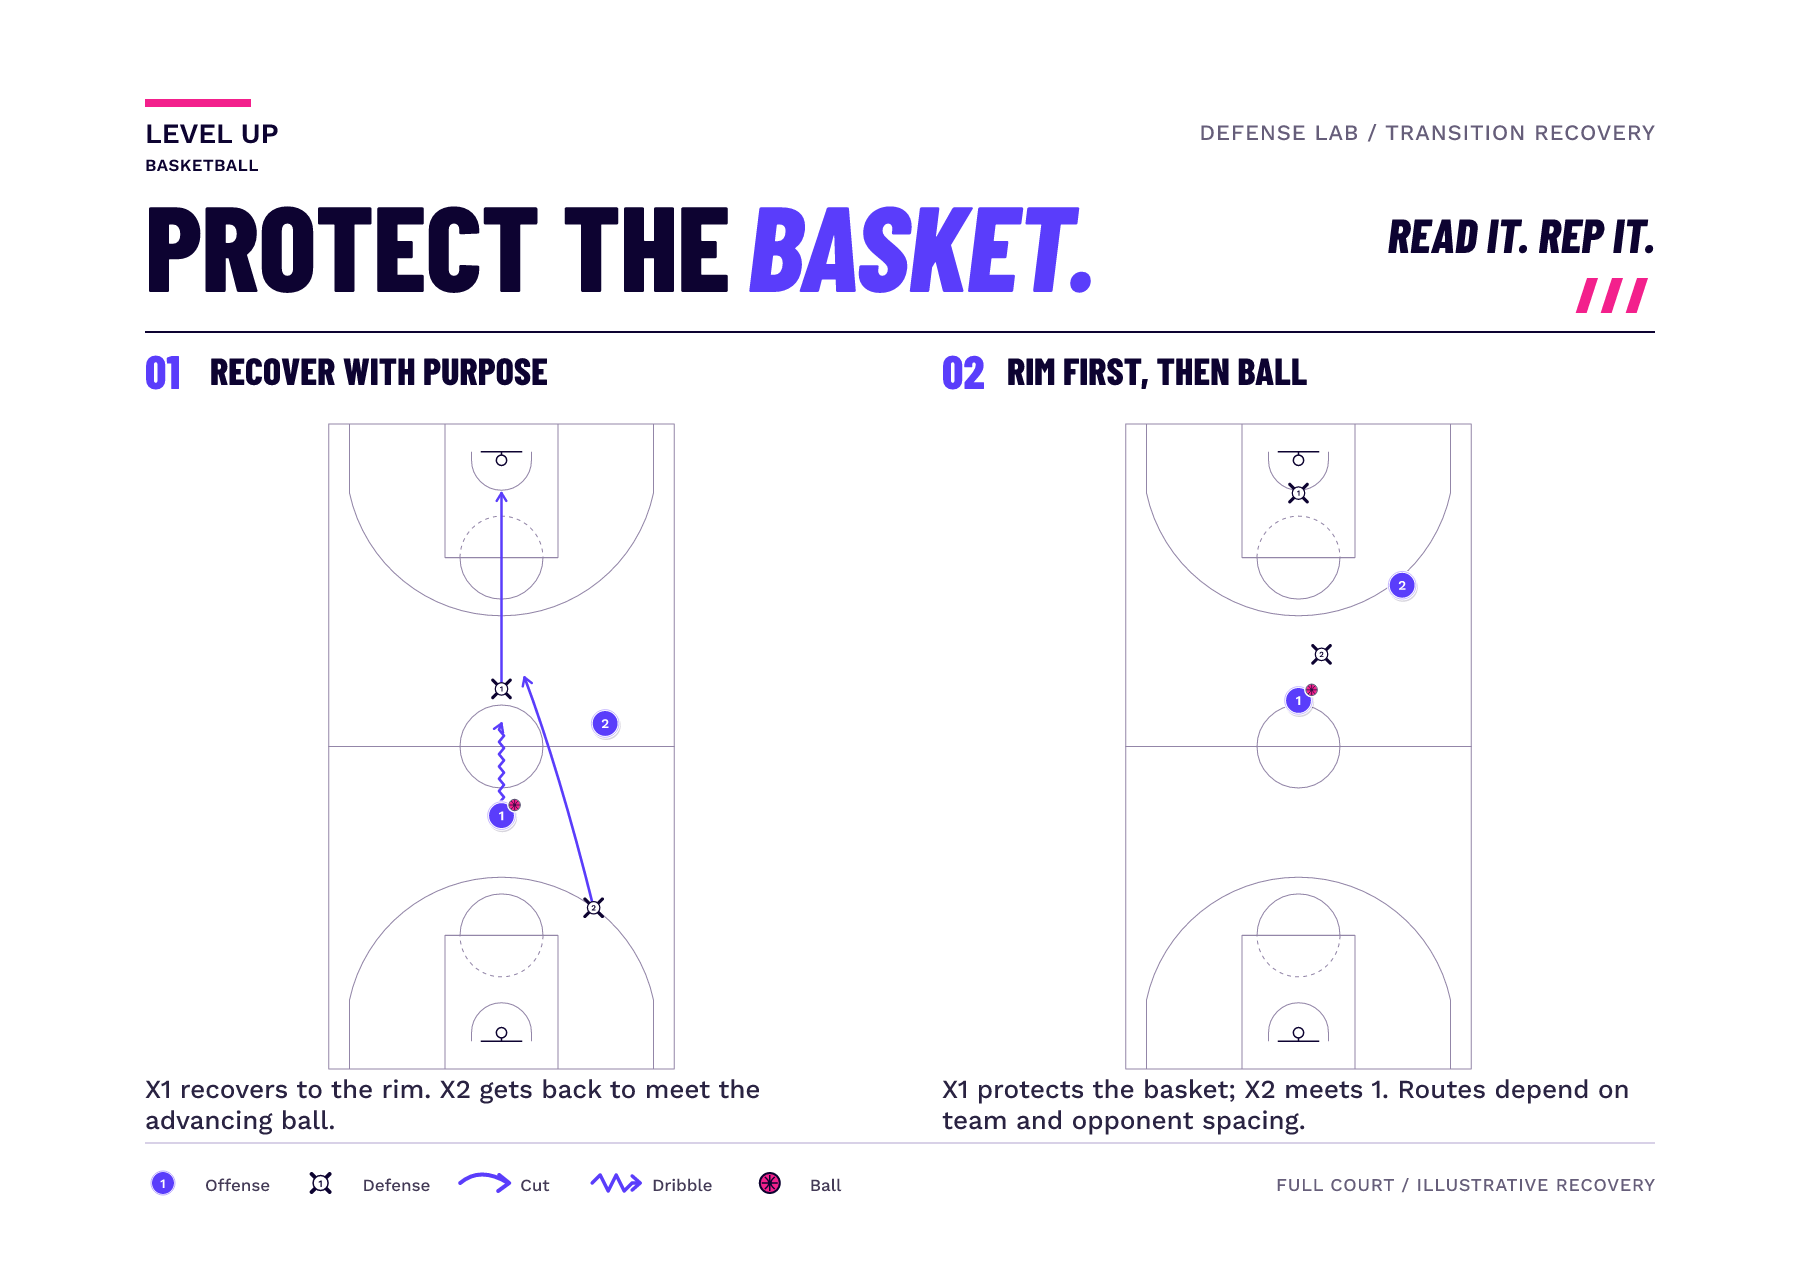
The first defender to recover must establish a strong position near the basket. The first player back in transition defense should run to the rim and take one step out to defend the hoop and force at least one pass. By running to the rim and taking one step out, this player is positioned to defend the hoop. This specific positioning is designed to force at least one pass, which delays the opponent's attack and allows teammates to recover.
Tactical rules for stopping the ball vary by age and skill level. For high school teams and above, the second player back should find and stop the ball wherever it is, even if it is just over the half-court line. Instead of running directly to the paint, the second player back must locate the ball and stop it immediately. Finding and stopping the ball wherever it is, even if it is just over the half-court line, is a key responsibility for high school teams and above.
Swipe sideways to explore the full diagram.
Managing Disadvantage Situations
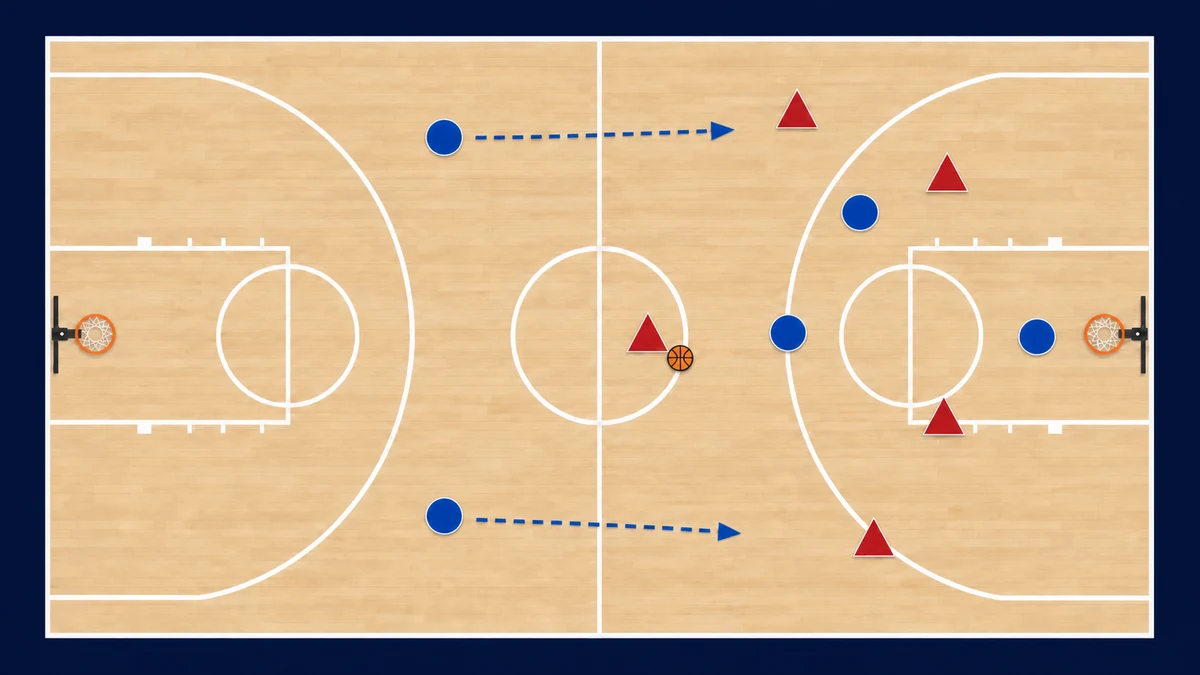
Defending when outnumbered requires strict adherence to positional rules. In 2-on-1 and 3-on-2 fast break situations, the defense must follow a standard rule to get as low to the baseline as the lowest offensive player. This standard rule ensures that defenders are positioned deep enough to protect the basket. By getting as low to the baseline as the lowest offensive player, the defense prevents the opponent from getting behind them for easy scoring opportunities in 2-on-1 and 3-on-2 situations.
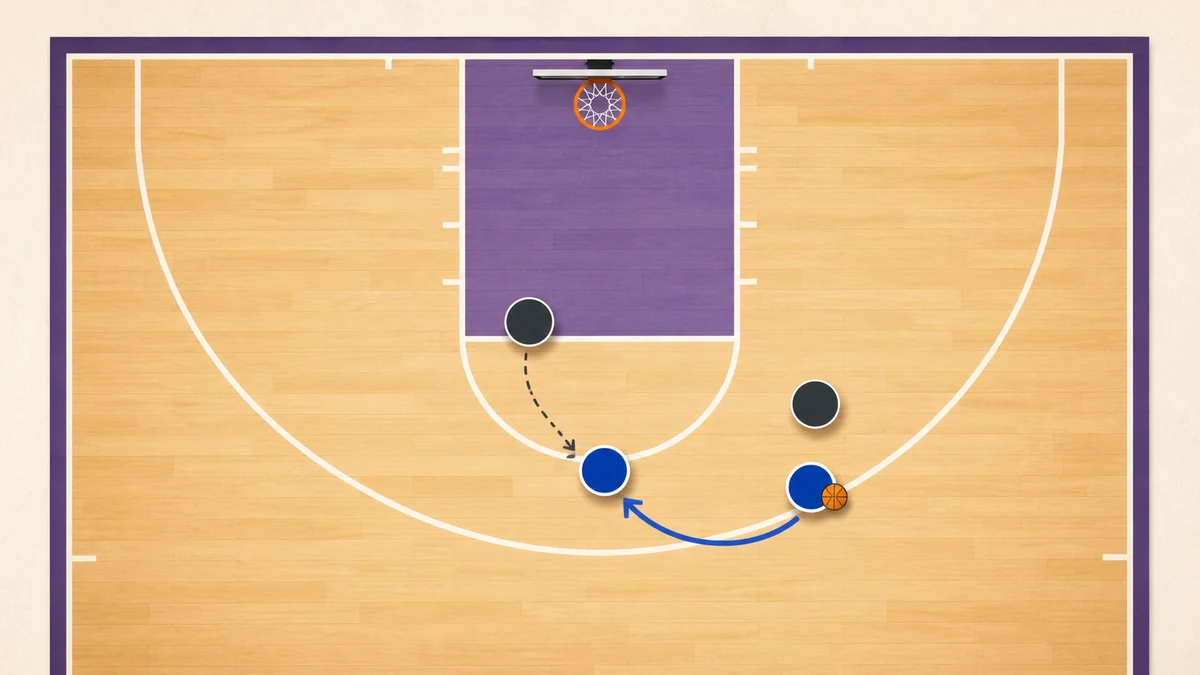
When facing a lone attacker with a teammate, the defender must use specific movement techniques. In a 2-on-1 situation, the defender should stay right under the basket, fake at the ball, and recover to force a pass or pull-up. Staying right under the basket protects the rim, while faking at the ball and recovering disrupts the ball-handler's decision-making. This combination of staying under the basket, faking, and recovering is designed to force a pass or a pull-up.
Defenders must make tactical concessions when outnumbered in transition. In a 2-on-1 situation, the defender should allow the outside jumper rather than challenging the ball away from the basket, as it is a lower percentage shot and avoids fouls. Challenging the ball away from the basket increases the risk of giving up a layup or committing a foul. Allowing the outside jumper in a 2-on-1 situation is a preferred outcome because it is a lower percentage shot and avoids fouls.
Executing the 3-on-2 Stack and Rotations
A 3-on-2 fast break requires coordinated action and clear communication between the two defenders. In a 3-on-2 situation, the top defender stops the ball and yells 'ball, ball, ball!', while the bottom defender sprints out to take the first pass. The top defender's responsibility is to stop the ball and communicate vocally by yelling 'ball, ball, ball!'. Simultaneously, the bottom defender must sprint out to take the first pass, ensuring both the ball and the first pass are defended.
The rotation of the top defender is critical as the ball moves in a 3-on-2 break. As the pass is made in a 3-on-2, the top defender must immediately drop back into the paint to get as low as the lowest offensive player. This movement must happen immediately as the pass is made. Dropping back into the paint to get as low as the lowest offensive player ensures the defense protects the basket after the bottom defender challenges the pass.
Matching Up and Youth Simplification
Coaching transition defense requires different approaches depending on the age group. For youth teams, transition defense can be simplified by having all players sprint back to the paint and match up from there. This simple instruction helps young players avoid confusion during transition. By having all players sprint back to the paint first, youth teams can protect the basket and then match up from there, making the defensive transition manageable and clear for young athletes.
The players who are not immediately stopping the ball or protecting the rim have a vital role in perimeter defense. The remaining three players in transition defense should sprint back with vision to identify and match up with the opponent's 3-point shooters. Sprinting back with vision allows these three players to see the floor. This vision helps them identify and match up with the opponent's 3-point shooters, preventing open perimeter shots during transition.
What this means for players and coaches
Understanding the structural limitations of transition defense is essential for players and coaches. A primary limitation occurs when a team shoots and fails to have at least one guard stay back beyond the three-point arc as a safety instead of rebounding. Furthermore, if the designated safety guard drives to the hoop, a second guard must assume the safety responsibility. Without these rules, establishing defensive balance becomes significantly more challenging, as the first two steps are critical when sprinting back on defense.
Another limitation involves failing to adjust the defensive structure to the opponent's transition speed. Transition defense can be as simple as having one guard protecting back after a score, rebound, or steal, with the rest of the team hustling back on defense. However, if the opponent is a fast-breaking team, transition defense may require two guards back. Regardless of the scheme, the primary goal of transition defense is to prevent the opponent from scoring easy lay-ups on the break.
Frequently asked questions
What are the first priorities in transition defense?
Teams generally need to stop the ball, protect the basket, identify dangerous runners, and then recover into matchups. The order and terminology vary, but sprinting back without communication or spatial priorities can still leave the defense unorganized.
Who should stop the ball in transition?
The nearest available defender often takes the ball while teammates protect the rim and locate threats, but team rules can assign responsibilities differently. The key is early communication so two defenders do not take the same job.
How can a team practice transition defense?
Use advantage and disadvantage situations that force players to sprint, communicate, protect the basket, and match up after the initial stop. The drill should reward correct priorities and decisions, not only whether the offense happens to miss.